The interface at a glance
Note: the DevyPOS interface is currently available in German and English. Screen labels quoted here are the English ones.
Once you understand the layout, everything else follows by itself. This chapter is the map.
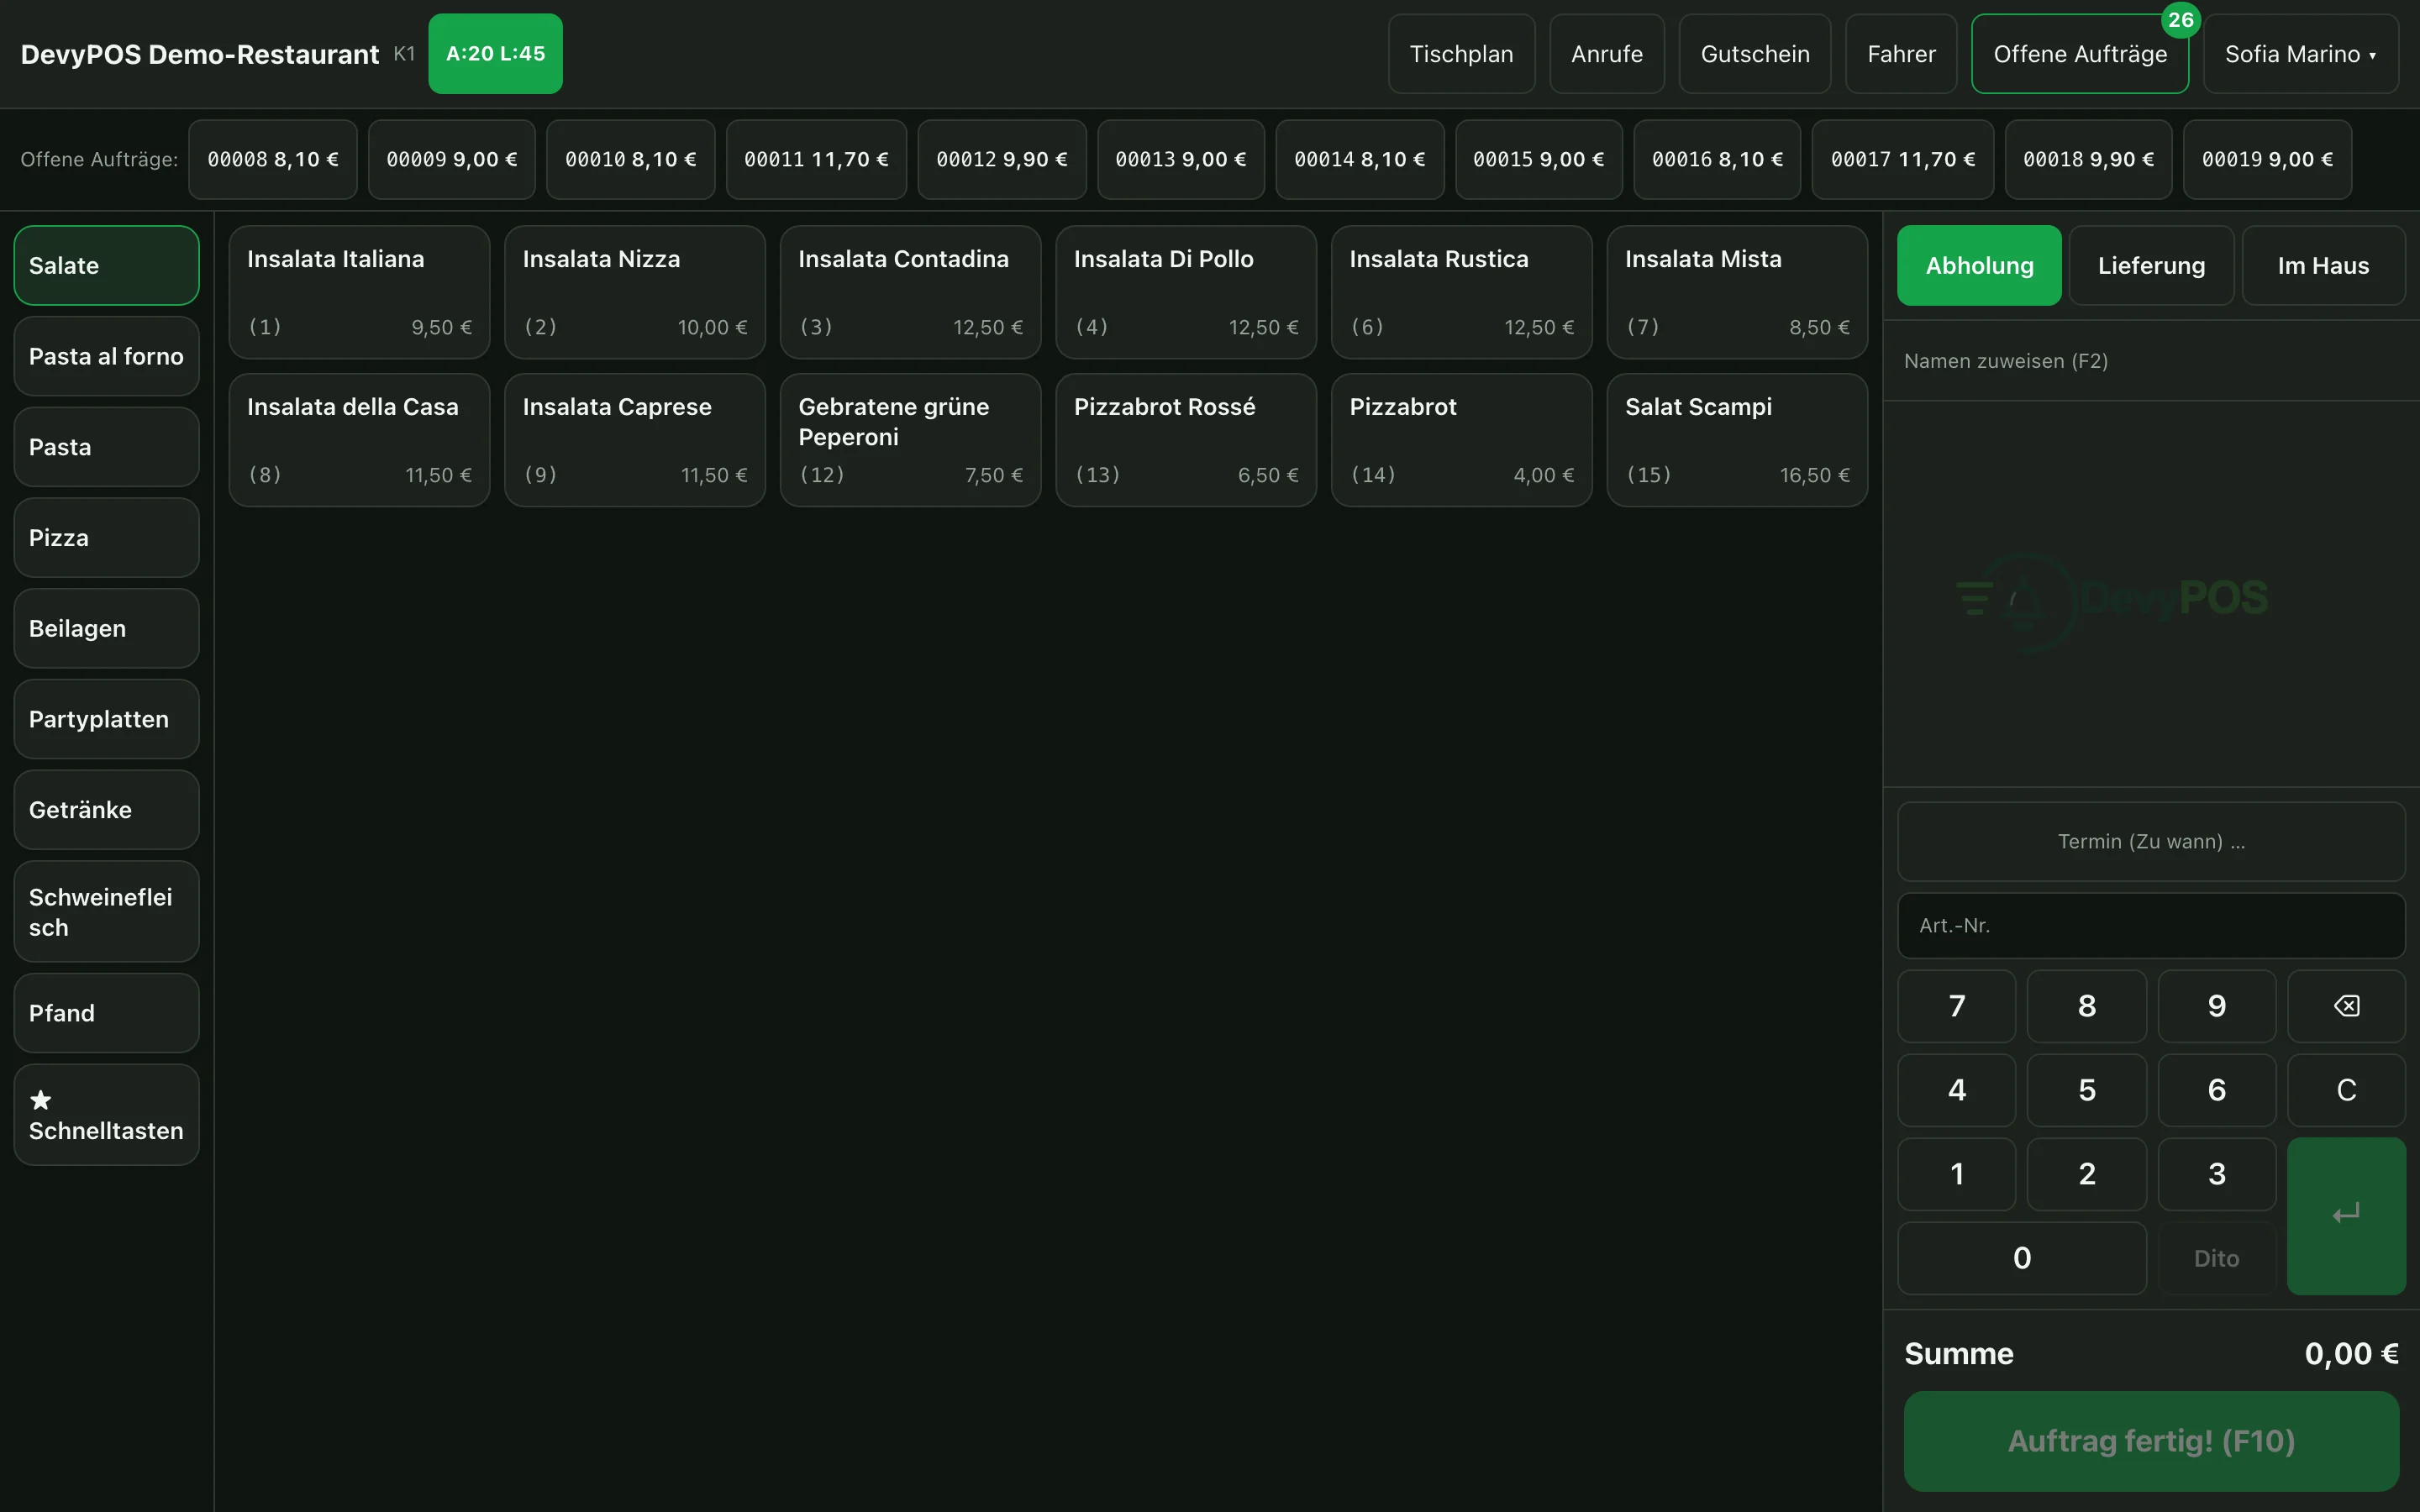
1. The till
In the “Klassik” design (the default for new businesses) the till screen is divided into five areas:
- Header: on the left the name of the business and the current waiting times (A: pickup, L: delivery); on the right Table plan, Calls, Voucher, Drivers (tours and settlements, including the waiters’), Orders with the number of open orders, the menu behind your name (Info, X report, Z closing, Cash book, Backoffice) and the padlock for signing out.
- Order type and customer: at the top of the middle column Pickup, Delivery or Dine-in, below it the customer’s name or delivery address.
- Items and product groups: the large area on the right – the items of the selected group at the top, the product groups below. Product groups can carry their own colour so your hand finds them in dim light.
- Order: at the top left the running order with line items and ingredient changes; below it the item summary, the total and the button Order done! or Charge.
- Number pad: at the bottom of the middle column the input for the item number (Item no.) – ↵ rings it up, Repeat repeats the last line, +/− opens the ingredients of the line rung up last.
Under Settings → Design you can choose the “Modern” design instead: product groups on the left, items in the middle, the order on the right.
2. The back office
| Menu item | What for |
|---|---|
| Overview | Revenue today, receipts, open orders |
| Menu | Product groups, items, sizes, ingredients, choice items |
| Customers | Customer base, customer groups, consent |
| Staff | Accounts, roles, PIN, hourly rate, travel costs |
| Table plan | Create rooms, tables and areas |
| Promotions | Discounts, offer prices, quantity deals |
| Reports | Z reports, cash book, VAT, day journal, sales statistics, DATEV export, DSFinV-K export |
| Supplies | Order receipt rolls, printers and accessories |
| Invoices | Your own invoices for DevyPOS (only visible if your business is billed directly – not when billing runs through a dealer) |
| Settings | Business & receipt, Register & closing, Delivery areas (ZIP), Opening hours, Payment methods, Design, Printers, Connector, Devices, TSE |
Switching between the two: in the back office Open register takes you to the front; in the till, Backoffice in the menu behind your name opens the back office – directly for managers and admins, everyone else sees the back office sign-in. Both may be open at the same time – for example the menu in the office while service is running at the front.